Here you'll find the full technical documentation.
Pages
Each HTML5-file may contain one or more pages. A page is created using a section-tag. Place your first section after the opening body-tag and fill it with the content of your service. If you need to use multiple pages you can simply add more section-tags. In the example below you can see an example of how this works.
<!DOCTYPE html>
<html>
	<head>
		<meta charset="UTF-8" />
		<meta name="viewport" content="width=device-width,
			initial-scale=1.0, user-scalable=no" />
		<meta name="format-detection" content="telephone=no" />
		<!-- title (not used) -->
		<title>The name of the service</title>
		<!-- frontend framework -->
		<script src="http://ff-sundbyberg.helloumbra.com/current/"></script>
		<!-- optional stylesheet for this service -->
		<link rel="stylesheet" href="assets/css/myservice.css" />
	</head>
	<body>
		<!-- each body must contain att least one section
			that is shown as a page -->
		<section>
			<!-- each section should have a header -->
			<header>
				<!-- each header should have a <h1> that represents
					the page title -->
				<h1>Page one</h1>
			</header>
			<!-- page elements¹ -->
		</section>
		<!-- optional additional sections (pages) -->
		<section>
			<!-- […] -->
		</section>
		<section>
			<!-- […] -->
		</section>
		<!-- all javascript should be included
			after the last section element -->
		<!-- optional javascript for this service -->
		<script src="assets/js/myservice.js"></script>
	</body>
</html>
Page data-ff-roles:
HTML section-tags can have a data-ff-role-attribute that configures the page. All available data-ff-role-attributes are listed below:
data-ff-role attributes for section elements
default |
This attribute states which section will show first. If there is no default attribute anywhere the first section in the source will be shown.
|
home |
Mark a section as home. A home section will not have a back button in the navigation bar. |
no-cache |
Do not cache if the section is loaded with xhr multiple times. |
swipe-in |
Load section with swipe animation (if the link was loaded with data-ff-role="xhr") |
Loding pages with xhr (ajax)
If a page is loaded with a link that has data-ff-role="xhr" (see example) only two elements of that page will be loaded. All script-elements with data-ff-role="include" set, as well as all section elements.
Below is an example of a resource loaded with xhr. Due to the fact that xhr-resources only load script and section-tags, the CSS definitions should be included in the previous page.
<!DOCTYPE html>
<html>
	<!-- if this is loaded with xhr, then … -->

	<!-- … the header is ignored -->
	<head><!-- head definitions --></head>
	<body>
		<!-- … every section is loaded -->
		<section><!-- section content --></section>
		<section><!-- section content --></section>

		<!-- … this script is loaded since it's using data-ff-role=include -->
		<script src="include-me.js" data-ff-role="include"></script>

		<!-- … this script isn't loaded because data-ff-role=include is missing -->
		<script src="ignore-me.js"></script>
	</body>
</html>
Page elements included in the framework:
There are several useful page elements included in the front end framework. These can be used to quickly build out a service. It's either the actual html element, or you can set a class name to add specific behaviour and/or layout.
List of page elements (children of body>section)
article.ff-content (or *.ff-content) |
A text content wrapper |
nav.ff-menu > ul |
Navigation |
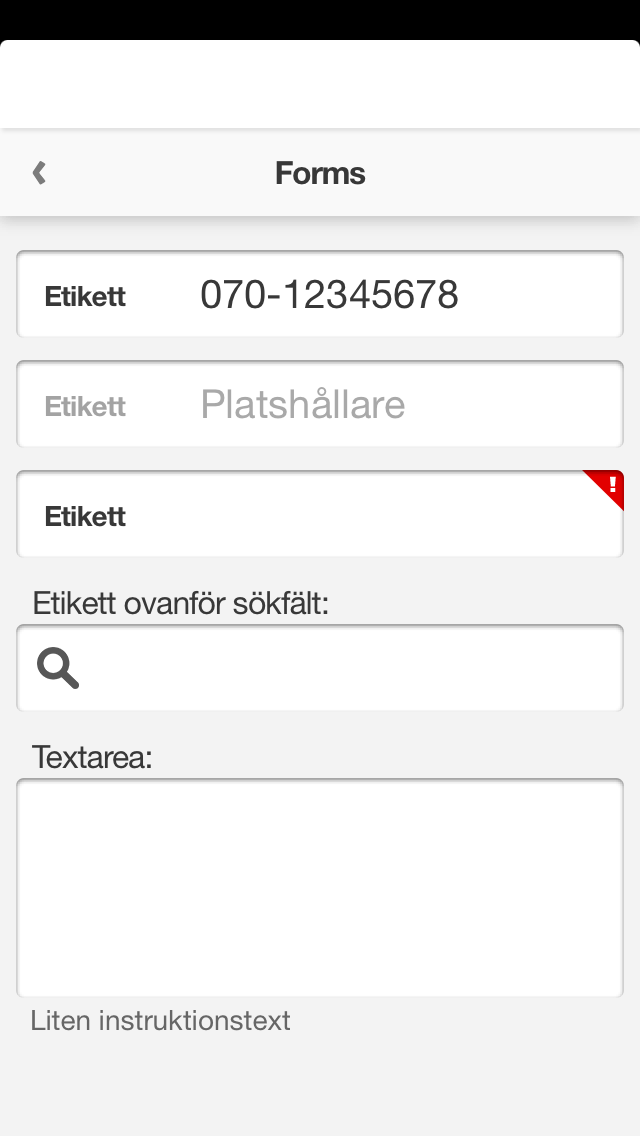
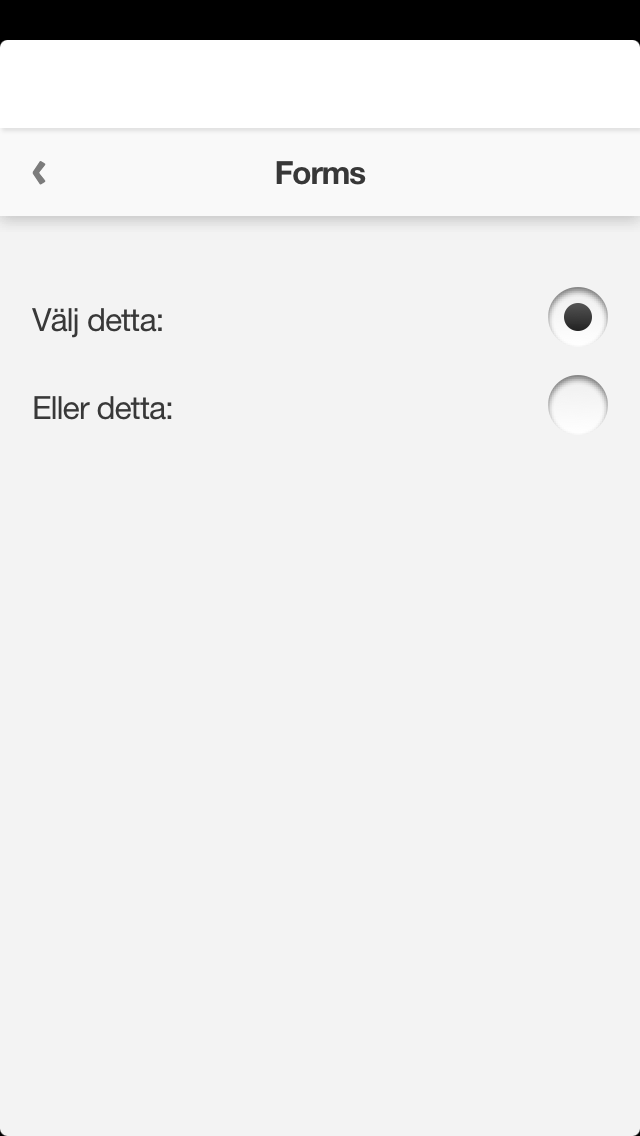
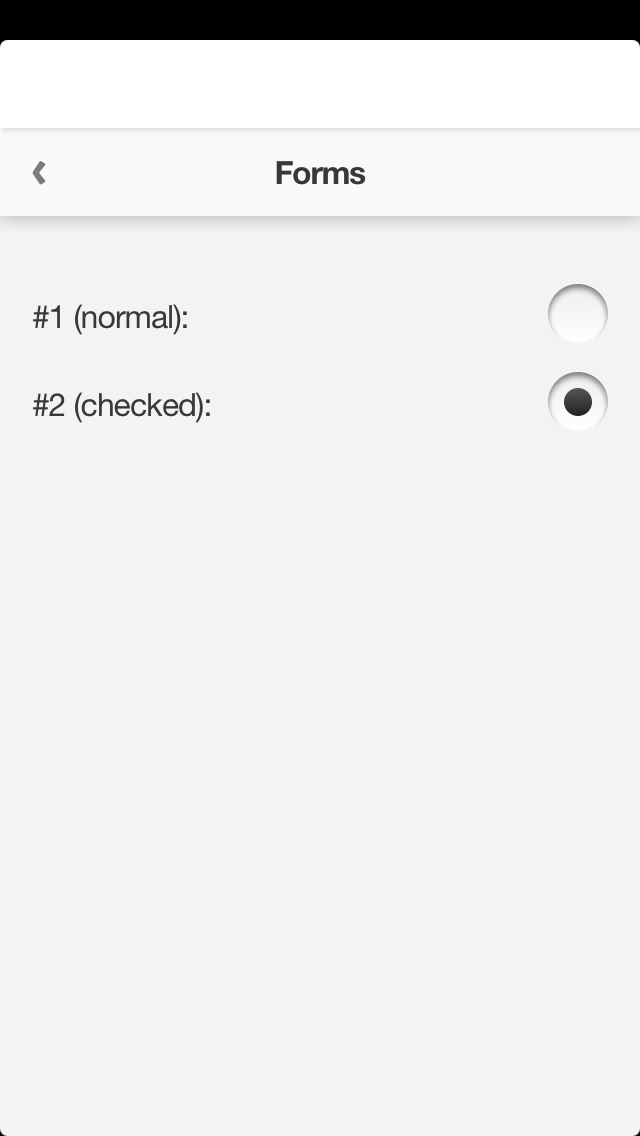
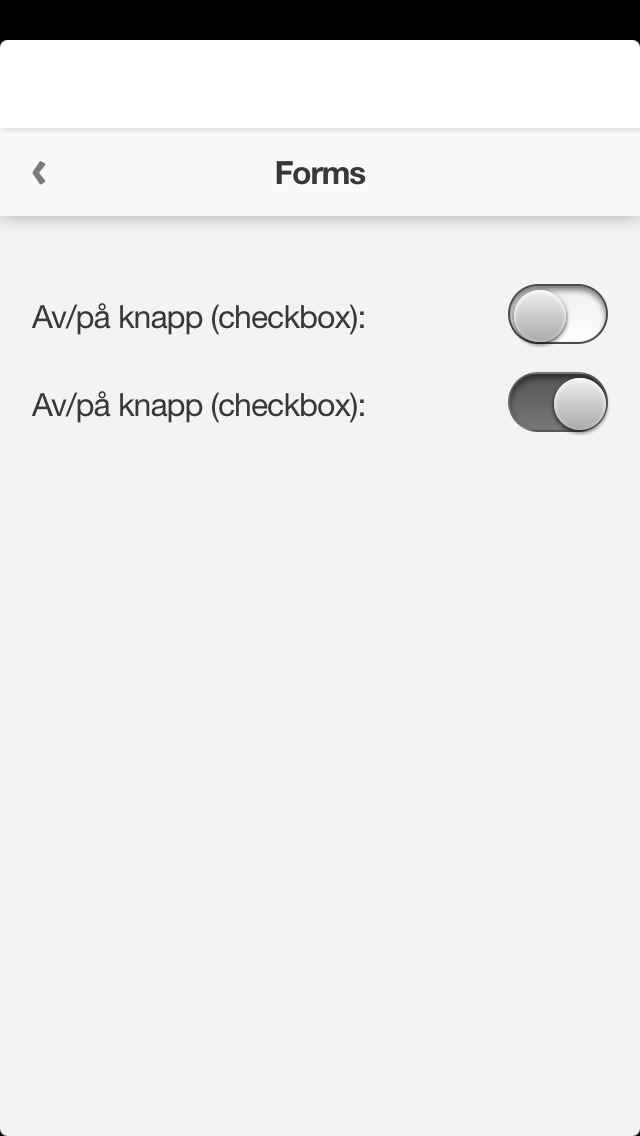
ul.ff-form |
Form elements |
table |
Tables |
ul.ff-swipe |
Swipe containers for or image galleries |
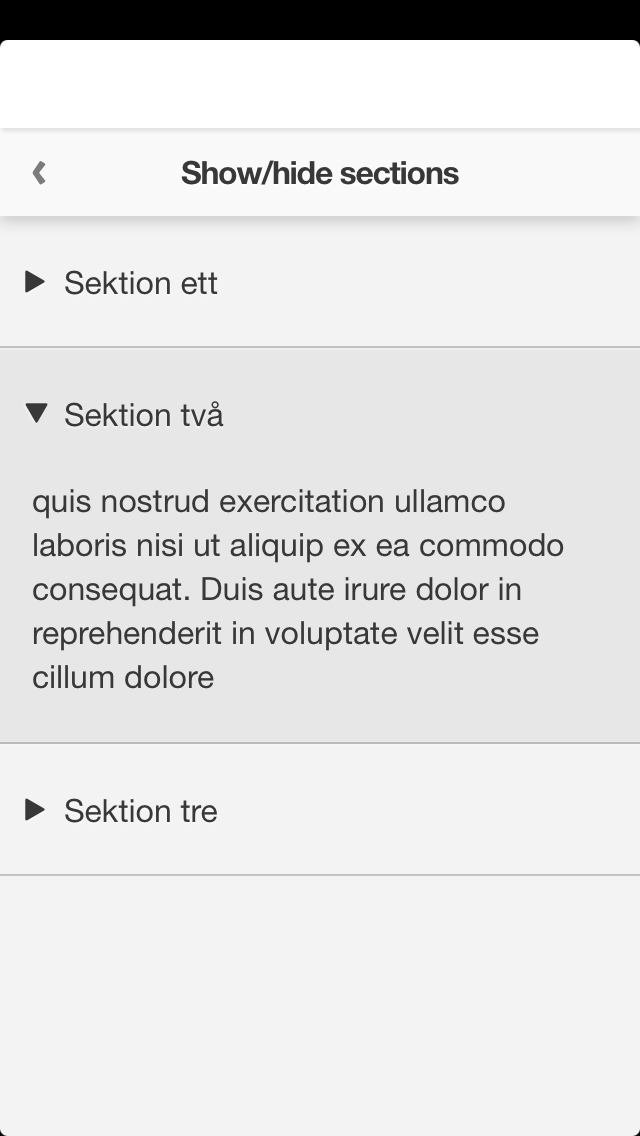
dl.ff-accordion |
Accordions that can contain content to show/hide |
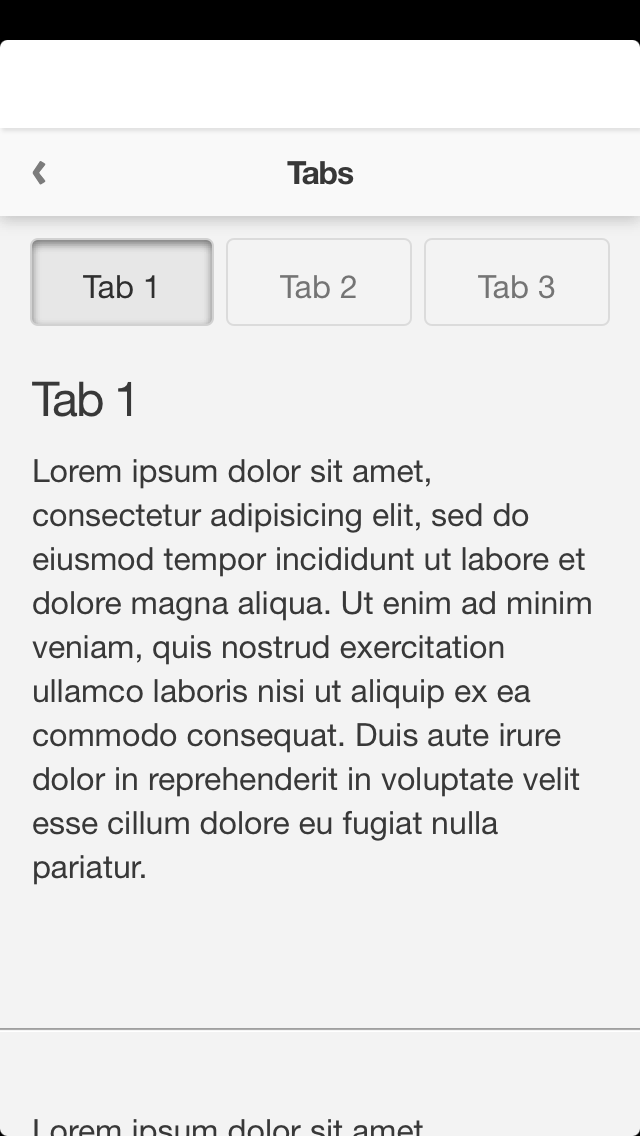
ul.ff-tab-navigation +
*.ff-content[data-ff-role="tab-group"] |
Tabs that can contain content |
Page api
Static methods:
FF.Page.getActive
Returns the active page which is visible right now.
| Method | FF.Page.getActive |
|---|
| Request params | (none) |
|---|
| Response | a FF.Page object |
|---|
FF.Page.getByNode
Returns a page by a given jQuery node
| Method | FF.Page.getByNode |
|---|
| Request params | (object) jquery node or (string) selector |
|---|
| Response | a FF.Page object or a FF.NoPage object |
|---|
Snippet pages-getByNode.js is missing.
FF.Page.addSection
Adds a section as a page. It may be a section that already lies in the DOM or a section, html snippet that should be added to the DOM as well
| Method | FF.Page.addSection |
|---|
| Request params | (mixed) input, (bool) addToDom |
|---|
| Response | (none) |
|---|
Snippet pages-addsection.js is missing.
Object methods:
page.getNode
Returns the section-node, which contains the HTML-presentation of the page
| Method | page.getNode |
|---|
| Request params | (none) |
|---|
| Response | (object) jquery node |
|---|
page.equals
Tests if a page equals another page
| Method | page.equals |
|---|
| Request params | (FF.Page) other page |
|---|
| Response | (bool) equality |
|---|
page.exists
Tests if this page exists
| Method | page.exists |
|---|
| Request params | (none) |
|---|
| Response | (bool) page existance |
|---|
page.findNodes
Find nodes in the page. A shortcut for page.getNode().find)()
| Method | page.findNodes |
|---|
| Request params | (string) selector |
|---|
| Response | jQuery nodes |
|---|
page.getId
Returns the id of the page, taken from the id-attribute of the section-node
| Method | page.getId |
|---|
| Request params | (none) |
|---|
| Response | (string) page id |
|---|
page.getTitle
Returns the title of the page, taken from the h1 element in the section header
| Method | page.getTitle |
|---|
| Request params | (none) |
|---|
| Response | (string) page title |
|---|
page.hasDataRole
Checks, if the page has a certain data role
| Method | page.hasDataRole |
|---|
| Request params | (string) data role |
|---|
| Response | (bool) existance of this data role |
|---|
page.triggerDomChange
Triggers an event that signals the framework that it should re-init the page, e.g. to add click handlers on links
| Method | page.triggerDomChange |
|---|
| Request params | (none) |
|---|
| Response | (none) |
|---|
FF.Service.ready(function() {
	$.get(DATA_URL).done(function(content) {
		$('#main > header').after(content);
		FF.Page.getByNode('#main').triggerDomChange();
	});
});
page.on
Runs a callback if a page event is triggered
| Method | page.on |
|---|
| Request params | (string) event, callback |
|---|
| Response | (none) |
|---|
Snippet pages-getByNode.js is missing.
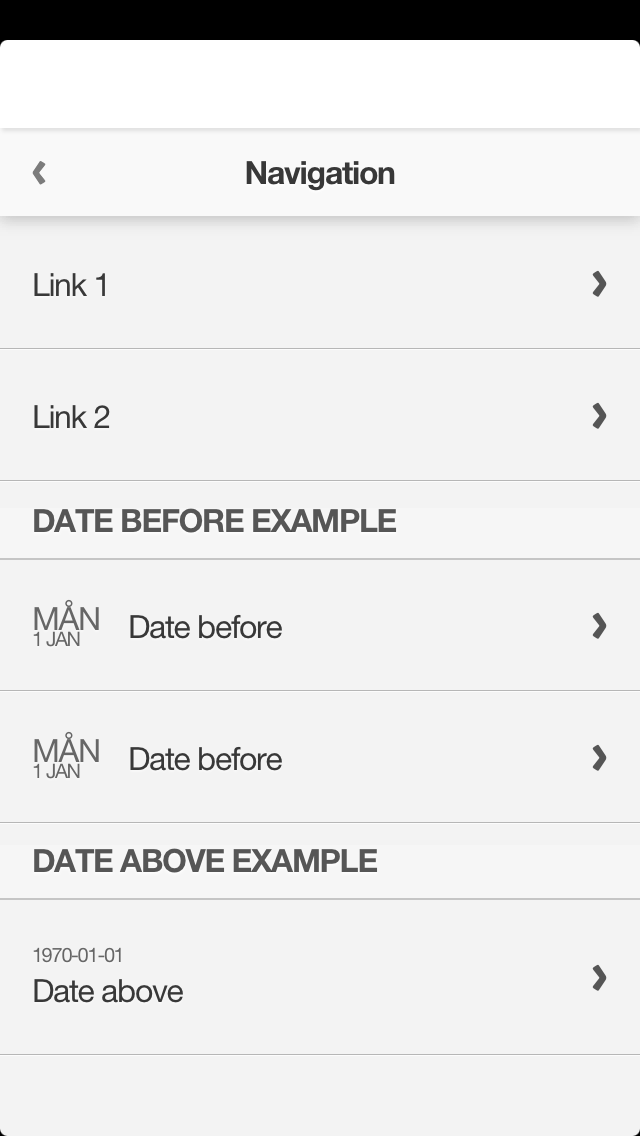
Navigation
Use for:
- Navigation between a large number of pages or items
- Multi-level navigation
Implementation:
A navigation menu like the one pictured is a list contained inside a nav-element.
<nav class="ff-menu">
	<ul>
		<li><a href="#page-1">Link 1</a></li>
		<li><a href="#page-2">Link 2</a></li>
		<li><a href="#page-3">Link 3</a></li>
		<!-- […] -->
	</ul>
</nav>
Internal links begin with the hash sign (#), and should link to other pages (section elements) inside the same file. If you load new page with xhr the link requires data-ff-role="xhr". If that attribute is missing the link is treated as external, and is opened in the web browser on the device.
<nav class="ff-menu">
	<ul>
		<li>
			<a href="#page-1">
				Internal link
			</a>
		</li>
		<li>
			<a href="page2.php" data-ff-role="xhr">
				Link on the same domain to a file that's loaded with xhr (ajax)
			</a>
		</li>
		<li>
			<a href="http://other-domain.example.org" data-ff-role="xhr">
				This won't work. Xhr-links has to be on the same domain.
			</a>
		</li>
		<li>
			<a href="page3.php">
				External link on the same domain, will open inside the service.
			</a>
		</li>
		<li>
			<a href="http://page4.example.org" rel="external">
				External link, will open in external web browser.
			</a>
		</li>
	</ul>
</nav>
Technically the navigation is not hierarchical. Instead pages are linked to from a table navigation:
<section data-ff-role="home default swipe-in">
	<!-- header and page element -->
	<nav class="ff-menu">
		<ul>
			<li><a href="#page-1">Menu item 1</a></li><!-- to #page-1 -->
			<li><a href="#page-2">Menu item 2</a></li>
			<li><a href="#page-3">Menu item 3</a></li>
		</ul>
	</nav>
</section>

<section data-ff-role="swipe-in" id="page-1">
	<!-- header and page element -->
	<nav class="ff-menu">
		<ul>
			<li><a href="#page-1-1">Menu item 1.1</a></li>
			<li><a href="#page-1-2">Menu item 1.2</a></li><!-- to #page-1.2 -->
		</ul>
	</nav>
</section>

<section data-ff-role="swipe-in" id="page-1-2">
	<!-- header and page element -->
	<nav class="ff-menu">
		<ul>
			<li><a href="#page-1-2-1">Menu item 1.2.1</a></li>
			<li><a href="#page-1-2-2">Menu item 1.2.2</a></li>
		</ul>
	</nav>
</section>

<!-- additional pages -->
Adding information in navigation lists
Important information like today's date can be added in the navigation lists:
<section data-ff-role="home default swipe-in">
	<nav class="ff-menu">
		<ul>
			<li class="ff-date-above">
				<a href="#test-foo"><date>2012-01-09</date>Date above</a>
			</li>
			<li class="ff-date-before">
				<a href="#test-oof">
					<date>
						<span class="ff-day">Mån</span>
						<span class="ff-date">30 aug</span>
					</date>
					Date before
				</a>
			</li>
		</ul>
	</nav>
</section>
Tables
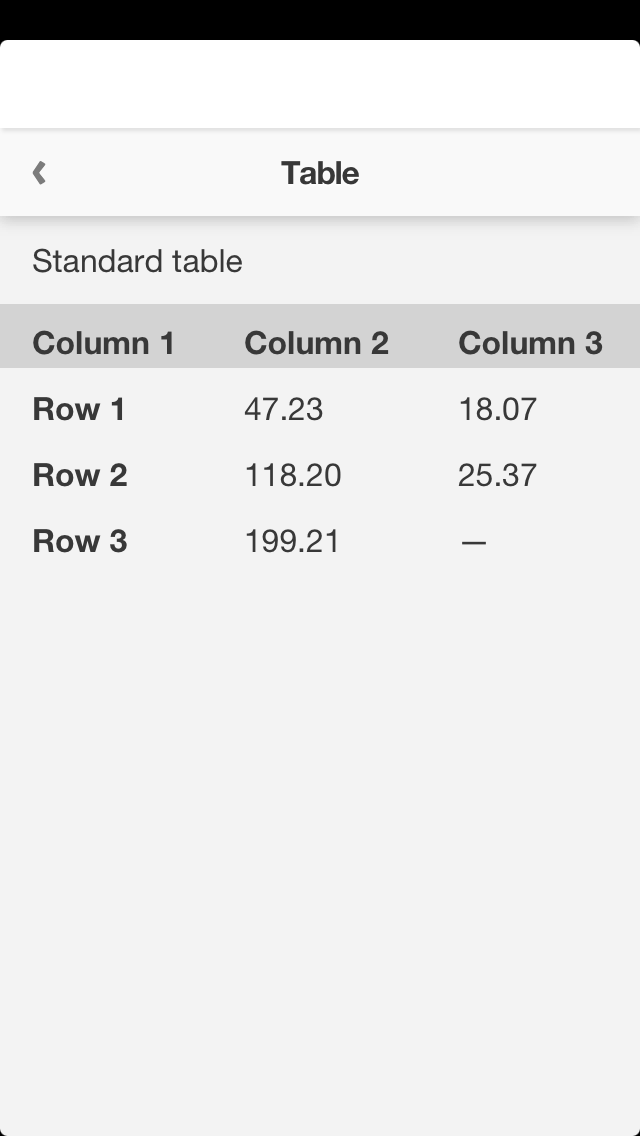
Complex tables generally do not work well on small screens. If you can avoid them you should. Often times it is better to simply list content vertically. But if you really need to use tables there are a few alternatives to choose from.
<table>
	<!-- optional header -->
	<caption>Standard table</caption>
	<!-- /optional header -->
	<thead>
		<tr>
			<th>Column 1</th>
			<th>Column 2</th>
			<th>Column 3</th>
		</tr>
	</thead>
	<tbody>
		<tr>
			<th>Row 1</th>
			<td>47.23</td>
			<td>18.07</td>
		</tr>
		<tr>
			<th>Row 2</th>
			<td>118.20</td>
			<td>25.37</td>
		</tr>
		<tr>
			<th>Row 3</th>
			<td>199.21</td>
			<td>—</td>
		</tr>
	</tbody>
</table>
There are many classes you can use to style tables:
| Class |
HTML element |
Description |
| ff-alternate |
table |
Zebra striping |
| ff-hlined |
table |
Shows horizontal lines between rows |
| ff-vlined |
table |
Shows vertical lines between columns |
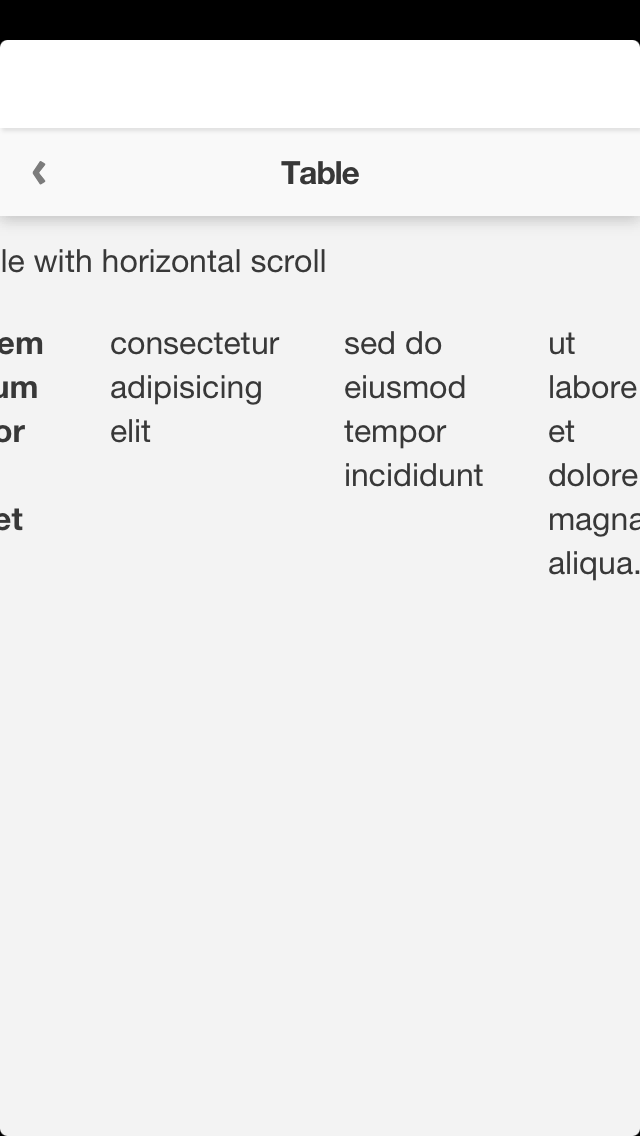
| ff-horizontal-scroll |
table |
Make the table scrollable to the side |
| ff-center |
th, td |
Centers a cell |
| ff-right |
th, td |
Aligns text to the right |
| ff-minimum-cell |
th, td |
Minimizes cell width without line breaks |
| ff-post |
span |
Centered & aligns text to the left |
| ff-pre |
span |
Centered & aligns text to the right |
Alternate rows
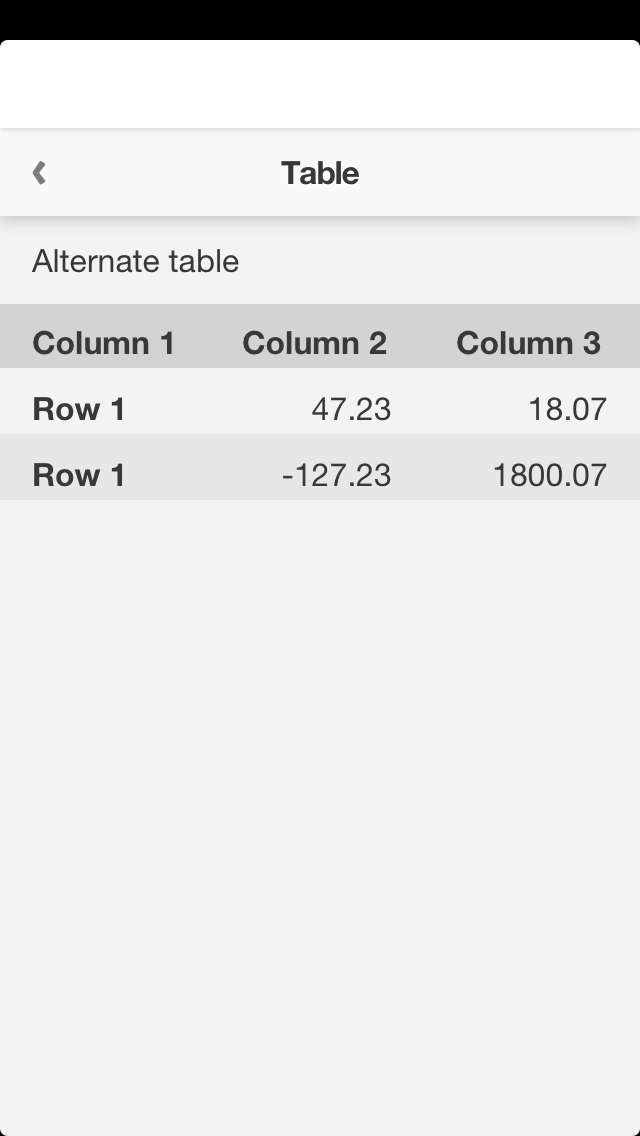
Table with alternating rows.
<table class="ff-alternate">
	<caption>Alternate table</caption>
	<thead>
		<tr>
			<th class="ff-minimum-cell">Column 1</th>
			<th>Column 2</th>
			<th>Column 3</th>
		</tr>
	</thead>
	<tbody>
		<tr>
			<th>Row 1</th>
			<td class="ff-right">47.23</td>
			<td class="ff-right">18.07</td>
		</tr>
		<tr>
			<th>Row 1</th>
			<td class="ff-right">-127.23</td>
			<td class="ff-right">1800.07</td>
		</tr>
	</tbody>
</table>
Horizontal lines
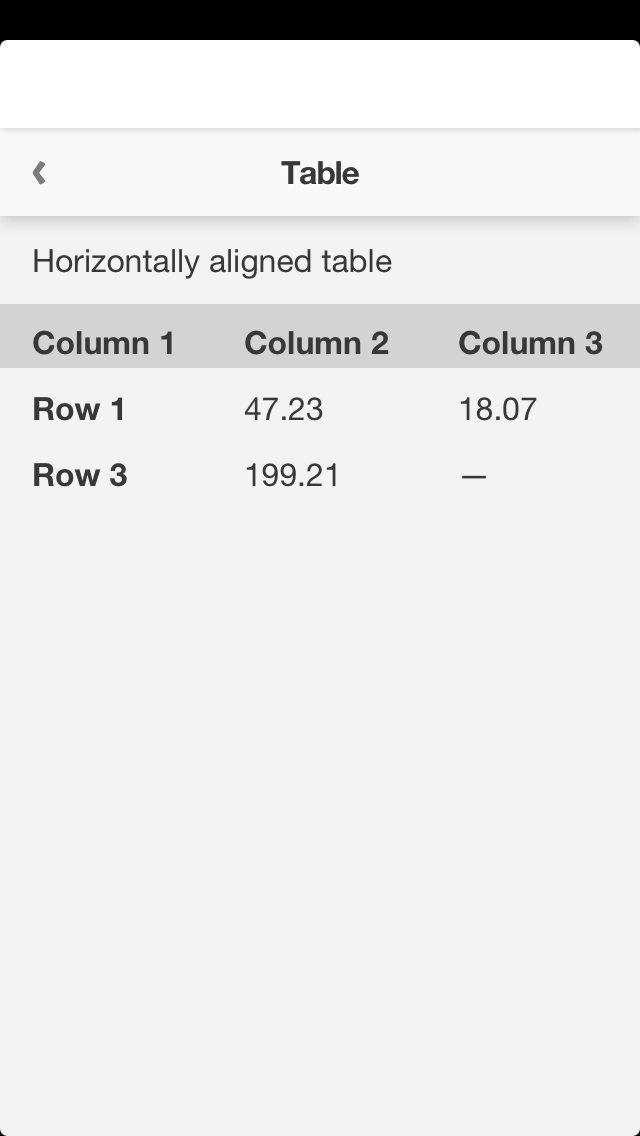
Tables with horizontal lines uses the class .ff-hlined, additionally you can use .ff-vlined to show vertical lines, see example in the Centered table.
<table class="ff-hlined">
	<caption>Horizontally lined table</caption>
	<thead>
		<tr>
			<th>Column 1</th>
			<th>Column 2</th>
			<th>Column 3</th>
		</tr>
	</thead>
	<tbody>
		<tr>
			<th>Row 1</th>
			<td>47.23</td>
			<td>18.07</td>
		</tr>
		<tr>
			<th>Row 3</th>
			<td>199.21</td>
			<td>—</td>
		</tr>
	</tbody>
</table>
Centered table

.ff-pre and .ff-post is helpful if you want to center text after a certain line. This is useful for centering opening hours where the hours are to be centered.
The text in ff-pre and ff-post can be no longer than 40% of the full width of the table.
<table class="ff-vlined">
	<tbody>
		<tr>
			<th>Monday to friday</th>
			<td class="ff-center">
				<span class="ff-pre">9</span> – <span class="ff-post">22, Fr: 23</span>
			</td>
		</tr>
		<tr>
			<th>Saturday</th>
			<td class="ff-center">
				<span class="ff-pre">10</span> – <span class="ff-post">17</span>
			</td>
		</tr>
		<tr>
			<th>Sunday</th>
			<td class="ff-center">
				<span class="ff-pre">New: 11</span> – <span class="ff-post">16</span>
			</td>
		</tr>
	</tbody>
</table>
Modal dialogs
Modal dialogues can be used to display many different system messages.
The dialogues are like popups, which means that they cover the screen for a duration of time. They remain visible until closed automatically, or until the user responds to a prompt.
If you are displaying important information in a modal, don't close it automatically. Instead, give the user time to read the text and let them remove the box by pressing a button.
API
Available modal boxes:
Creating modals:
var modal = new FF.Modal.ButtonPopup(options); // or ErrorPopup or …
Comparison of modals:
| Attributes |
Description |
Button |
Error |
Progress |
Success |
buttons |
An object with buttons |
✔ | ✔ | ✘ | ✔ |
content |
En descriptive text |
✔ | ✔ | ✔ | ✔ |
timeout |
En timeout (in milliseconds) to close the modal |
✘ | ✔ | ✘ | ✔ |
title |
Title of the modal |
✔ | ✘ | ✘ | ✘ |
Methods:
close() |
closes the modal. This can be used for boxes that do not have a button for closing it, or a defined timeout |
done(function) |
perform an action after the modal is closed. See example. |
open() |
opens the modal |
You can open several modals, but only show one at a time. If you open several modal boxes, only the first one will be visible - while the rest wait in queue. When the first modal box is closed, the next modal is shown.
FF.Service.ready(function() {

	// opens right away
	new FF.Modal.ProgressPopup({
		content: 'Sidan laddas …',
		// it's not meaningful to use a timeout in a
		// ProgressPopup. This is only to keep this example short
		timeout: '2000'
	}).open();

	// opens after the first modal is closed
	// (in this example, after 2 seconds)
	new FF.Modal.SuccessPopup({
		content: 'Ansökan skickades',
		buttons: { 'true': 'OK'}
	}).open();

});
alert
Use to:
FF.Service.ready(function() {

	new FF.Modal.alert('Service is loaded!');

});
This method works very similar to native javascript code (alert), but is a wrapper to make it work on Sundbybergs stad. The alert is technically a shortcut for a specially designed SuccessPopup.
ErrorPopup
Use to:
Explain to the user what the error is about. Is a form submitted incorrectly or is there another problem?
If the user can correct the problem causing the error you should describe how they can solve it. Example: "Please enter your name in the form" is better than "Error: Name missing" (wrong).
FF.Service.ready(function() {

	new FF.Modal.ErrorPopup({
		content: 'Du måste godkänna användarvillkoren',
		buttons: {'true': 'OK'}
	}).open();

});
Modals for error messages are also used in
form validation.
ProgressPopup
Shows a loading symbol while waiting. Use this modal if you know a particular action takes more than 1-2 seconds over a 3G-connection. This indicates to the user that the service is responding and that it is actively loading content.
Use to:
- show that the service is working on an action
In order to use this modal two JavaScript calls are required. One to define and open the modal, and another one to close it.
// simple example
var progress= new FF.Modal.ProgressPopup({
	title: 'progress'
}).open().done(function() {
	// do something when ready
});
window.setTimeout(function() { progress.close(); }, 3000);
The next example uses Deferred Object, a technology introduced in jQuery 1.5 that is useful for handling asynchronous functions like AJAX-requests.
FF.Service.ready(function() {

	var anAsynchronousRequest = function() {
		var dfd = $.Deferred();
		window.setTimeout(dfd.resolve, 2000);
		return dfd.promise();
	};

	// define and open modal
	var progress = new FF.Modal.ProgressPopup({
		content: 'Please wait'
	}).open();

	anAsynchronousRequest().done(function() {
		// close modal
		progress.close();
	});

});
SuccessPopup
A modal indicating "action successful" that either closes automatically or lets the user click a button (configurable text).
Use to:
- show that the interaction of the user was successful
If the message is short or not critical for the user to read you can close it after a while using the timeout-parameter:
FF.Service.ready(function() {

	new FF.Modal.SuccessPopup({
		content: 'Your account is ready.',
		timeout: 3000
	}).open();

});
If the text is a bit longer or is intended to be read it is better to use a button:
new FF.Modal.SuccessPopup({
	content: 'Thanks for registering, your account is now ready to use.',
	buttons: {'true': 'OK'}
}).open();
Layout independent methods
General methods of the framework you can call directly from your javascript to simplify things for your service.
FF.App
FF.App.openInBrowser
Open url in external browser.
| Method | FF.App.openInBrowser |
|---|
| Request params | (string) url |
|---|
| Response | (bool)
true = was opened in external browser |
|---|
Example
	$('#open-in-browser').submit(function(e) {
		e.preventDefault();
		FF.App.openInBrowser($('#url').val());
	});
FF.App.isAvailable
Shows if you are in inside the app view or not.
| Method | FF.App.isAvailable |
|---|
| Request params | (none) |
|---|
| Response | (bool)
true = app/WebView
false = web browser |
|---|
FF.App.getOS
Check what OS the user has.
| Method | FF.App.getOS |
|---|
| Request params | (none) |
|---|
| Response | (string) "ios" or "android" |
|---|
FF.App.isIOS
Check if on IOS.
| Method | FF.App.isIOS |
|---|
| Request params | (none) |
|---|
| Response | (bool) true if on iOS device. |
|---|
FF.App.isAndroid
Check what OS the user has.
| Method | FF.App.isAndroid |
|---|
| Request params | (none) |
|---|
| Response | (bool) true if on Android device. |
|---|
FF.App.getUid
Returns the device-id of smartphone. It is unique per app.
| Method | FF.App.getUid |
|---|
| Request params | (none) |
|---|
| Response | (string) uid |
|---|
FF.App.isDeveloperEnabled
Check if user has developer status, any debug output should check this first.
| Method | FF.App.isDeveloperEnabled |
|---|
| Request params | (none) |
|---|
| Response | (bool) true if user has developer status
|
|---|
FF.Console
With this object it’s possible to log to the app console that is activated for all devices that are developer enabled. The methods are a subset of window.console. All methods behave the same but show different styles in the app console. Keep in mind that FF.Console only takes one string parameter.
FF.Console.info
Example
FF.Console.info('This is an information');
FF.Console.log
Example
FF.Console.log('This is a log message');
FF.Console.warn
Example
FF.Console.warn('This is a warning');
FF.Console.error
Example
FF.Console.error('This is an error');
Before deploying a final version of your service you should remove all FF.Console calls.
FF.Env
FF.Env.getUserInfo
Returns javascript object with info that the user has added in the app.
| Method | FF.Env.getUserInfo |
|---|
| Request params | (none) |
|---|
| Response | (object) {(string) firstName:, (string) lastName:, (string) phone:, (string) email:} |
|---|
Example
{
	"firstName": "Robin",
	"lastName": "Robinsson",
	"phone": "070 000 00 00",
	"email": "someone@example.org"
}
FF.Env.getServiceInfo
Returns information about the service.
| Method | FF.Env.getServiceInfo |
|---|
| Request params | (none) |
|---|
| Response | (object) {(int) id:, (string) name:} |
|---|
FF.Env.getClientInfo
Returns the client string which is a unique string per app, e.g. whitelabel.
This can be useful if you develop a service that should run on several apps but have different
features or layout on each app.
| Method | FF.Env.getClientInfo |
|---|
| Request params | (none) |
|---|
| Response | (object) {(string) name:} |
|---|
FF.GoogleAnalytics
The framework uses Google Analytics for statistics. You don’t need to include GA by yourself, since it is part of the framework. Pages will be tracked automatically, therefore you will need these methods only if you want to track special events.
FF.GoogleAnalytics.trackEvent
Tracks an GoogleAnalytics event.
| Method | FF.GoogleAnalytics.trackEvent |
|---|
| Request params | (action, opt_label, opt_value, opt_noninteraction)
All opt_ params are optional. |
|---|
| Response | (none) |
|---|
Have a look at Googles Event tracking guide for a description of the request parameters. But keep in mind that Googles first parameter category is provided automatically by this framework using the service name.
Example:
FF.GoogleAnalytics.trackEvent('Search', 'Search:' + needle);
FF.GoogleAnalytics.trackPageView
This can be used if you use a custom solution to show pages. Example:
| Method | FF.GoogleAnalytics.trackPageView |
|---|
| Request params | (url) |
|---|
| Response | (none) |
|---|
Example:
FF.GoogleAnalytics.trackPageView(location.href);
FF.History
FF.History.push
Sends the user to another page.
| Method | FF.History.push |
|---|
| Request params | (FF.Page-object) page |
|---|
| Response | (none) |
|---|
FF.History.back
Sends the user to the previous page.
| Method | FF.History.back |
|---|
| Request params | (none) |
|---|
| Response | (none) |
|---|
FF.HttpRequest
If you just need the possibility to use the camera and send a POST request containing images it’s much easier to use the
image upload form component instead of using the FF.HttpRequest and the FF.Media objects.
FF.HttpRequest.requestPost
Sends an asynchronous post request that can contain form data and images. Use this method if you want to send data that contains images since this is not possible with JavaScript XHR. For standard forms however you can use JavaScript XHR or even better jQuerys ajax methods.
This method is asynchronous.
| Method | FF.HttpRequest.requestPost |
|---|
| Request params | either (formNode)
or (url, formData, requestHeaders) |
|---|
| Async response | (status, response, responseHeaders) |
|---|
parameter legend
| Name | Type | Description |
|---|
| formNode |
REQUEST |
A jQuery node containing the used form. It will translate form.action to url and the form elements to formData |
| url |
REQUEST |
The url the post request should be send to |
| formData |
REQUEST |
An array of objects in the form of jQuerys serializeArray. If name starts with @, e.g. @media, it is a reference to an internal media |
| requestHeaders |
REQUEST |
A javascript object with additional request headers. Headers could be any HTTP request header e.g. WWW-Authenticate or Cookie |
| status |
RESPONSE |
The HTTP status code |
| response |
RESPONSE |
The response as a string |
| responseHeaders |
RESPONSE |
A javascript object containing all response headers |
url = 'http://example.org/form/request';
formData = [
	{
		name:  'firstname',
		value: 'Robin'
	},
	{
		name:  'lastname',
		value: 'Robinsson'
	},
	{
		name:  'myimage',
		value: imageId
	}
];
headers = {
	"X-Custom-Foo": "A custom header",
	"X-Custom-Bar": "Another custom header"
};
FF.HttpRequest.requestPost(url, formData, headers)
	.done(function(status, response, responseHeaders) {
		FF.Modal.alert(status);
	})
	.fail(function(code, message) {
		FF.Modal.alert('Error ' + code);
	})
;
FF.Position
FF.Position.isAvailable
Tests if it's possible to get the users location via gps or other means.
| Method | FF.Position.isAvailable |
|---|
| Request params | (n/a) |
|---|
| Response | (bool) |
|---|
If this method returns false it means that the device has no gps (or other technique for getting the geolocation), that the user has deactivated the gps in general, or that the user forbid the app to use gps.
FF.Position.requestPosition
An asynchronous request that returns a javascript object with information about the users location (latitude/longitude). If the reverseData parameter is set to true the device will also try to fetch readable information about the location such as city and country. Use this only if you need the data, since it will increase the execution time because of the app requesting additional data per http.
This method is asynchronous.
| Method | FF.Position.requestPosition |
|---|
| Request params | (bool) reverseData |
|---|
| Async response | (object) {(float) lat:, (float) lng:, optional (object) reverseData:} |
|---|
FF.Position.requestPosition(true)
	.done(function(lat, lng, reverseData) {
		new FF.Modal.alert('Ah, so you are in ' + reverseData.country + '?');
	})
	.fail(function(code, message) {
		new FF.Modal.ErrorPopup({
			content: 'Error: ' + message,
			buttons: {'true': 'OK'}
		}).open();
	});
FF.Storage
It's possible to add values to an local cache, or storage. For example the users input if they suddenly go offline.
FF.Storage.set
Saves information in storage.
| Method | FF.Storage.set |
|---|
| Request params | (string) key:, (mixed) value |
|---|
| Response | (bool)
true = successful |
|---|
FF.Storage.isset
Checks if the offline storage has information for that key.
| Method | FF.Storage.isset |
|---|
| Request params | (string) key |
|---|
| Response | (bool)
true = is saved |
|---|
FF.Storage.get
Fetch the information of a specific key in the storage.
| Method | FF.Storage.get |
|---|
| Request params | (string) key |
|---|
| Response | (mixed) |
|---|
FF.Storage.unset
Deletes all informations associated with a key in offline storage.
| Method | FF.Storage.unset |
|---|
| Request params | (string) key |
|---|
| Response | (bool)
returns true if successful |
|---|
FF.Storage.drop
Deletes the the storage for the current service (all keys).
| Method | FF.Storage.drop |
|---|
| Request params | (none) |
|---|
| Response | (bool)
returns true if successful |
|---|
FF.Version
FF.Version.getAppVersion
Version of native app.
| Method | FF.Version.getAppVersion |
|---|
| Request params | (n/a) |
|---|
| Response | (string) |
|---|
FF.Version.getFrameworkVersion
Version of the frontend framework.
| Method | FF.Version.getFrameworkVersion |
|---|
| Request params | (n/a) |
|---|
| Response | (string) |
|---|
FF.Version.compare
Method to compare versions, either framework or app version. Two strings are compared and tested with the help of the comparison operator.
| Method | FF.Version.compare |
|---|
| Request params | (string), (string), comparison operator (see example and table below) |
|---|
| Response | (bool) |
|---|
if (FF.Version.compare(FF.Version.getFrameworkVersion(), '2',
	FF.Version.HIGHER_OR_EQUAL)) {
	// code for Framework version 2.0 or higher
}

if (FF.Version.compare(FF.Version.getAppVersion(), '2.0.1',
	FF.Version.LOWER)) {
	// code for App version lower than 2.0.1
}
The comparison operators are constants of the object FF.Version.
| Comparison operator |
Usage |
Description |
| LOWER |
FF.Version.LOWER |
First is lower than second argument |
| LOWER_OR_EQUAL |
FF.Version.LOWER_OR_EQUAL |
First is lower than or equal to second argument |
| EQUAL |
FF.Version.EQUAL |
First is equal to second argument |
| NOT_EQUAL |
FF.Version.NOT_EQUAL |
First is not equal to second argument |
| HIGHER |
FF.Version.HIGHER |
First is higher than second argument |
| HIGHER_OR_EQUAL |
FF.Version.HIGHER_OR_EQUAL |
First is higher than or equal to second argument |
FF.Viewport
Returns information about the viewport of the users mobile device.
FF.Viewport.getWidth
| Method | FF.Viewport.getWidth |
|---|
| Request params | (n/a) |
|---|
| Response | (int) width in pixels |
|---|
FF.Viewport.getHeight
| Method | FF.Viewport.getHeight |
|---|
| Request params | (n/a) |
|---|
| Response | (int) height in pixels |
|---|
FF.Viewport.getDevicePixelRatio
| Method | FF.Viewport.getDevicePixelRatio |
|---|
| Request params | (n/a) |
|---|
| Response | (float) pixel ratio |
|---|


Share
Share content to social networks like Twitter, Facebook, mail etc.
Example